Cakes pops are the hottest new trend for baking and making desserts. I've just recently mastered the art of making cake pops so I wanted to share the process of how easy and fun these things are to make. I will admit there is a trial and error process to making cake pops. The process is lengthy, but so worth it! I will share an awesome recipe. Cake pops are great for baby showers, bridal showers, bake sales, and weddings.
Cake Pop Recipe is as follows:
Materials:
- 1 box of white cake mix (and whatever ingredients you need to make the cake)
- 1 container of white frosting (I used whipped frosting, which is lighter, so I ended up using an entire XL container)
- 2 packages of candy melts (I used the pink ones from Michael's) They carry a variety of different colors, or you can buy the white ones and dye them to your liking. Only use gel food coloring to dye candy melts, as the liquid stuff won’t work.
- 1 bag of lollipop sticks (also from Michael's)
- 2 tb of shortening
- sprinkles (optional)
- large foam ring (found in the “wreath making” section at Michael's)
- Wilton cookie scooper (pic below)
Step 1: Choose your favorite flavor and go from there. Bake the cake as instructed. Let cake cool completely before crumbling.
Step 2: Crumble Cake/Mix Icing
Now this is the part that gets me every time. Its best to make your own icing or used just a little until you get a nice dough consistency. If you put too much icing it will leave the cake pops very very sweet. I recommend using one large serving spoon of icing.
Step 3: Roll Mixture Into Balls/Freeze for 2 Hours
Line a cookie sheet with wax paper. Use a wilton cookie scooper (see pic below). Next, take small portions of your cake/frosting mixture and use your hands to roll them into small balls and place them on the lined cookie sheet. The balls should be the size of a large gum ball. If you make them too big, they will fall off the stick during the candy coating process. Also, get bigger when you coat them with the candy, so start out making them smaller than you want your end product to be.
Step 4: Insert Lollipops into Cake Balls
You want to melt the candy as instructed on the bag. I put them in a glass cylinder mixing bowl and put my defrost setting on the microwave for about 3 minutes. You want to check the mixture every minute or so when using this setting. I found that trying to rush this step will leave your candy really thick and the wrong consistency for dipping. After the coating is completely melted you want to take your lollipop sticks and slightly dip them into the candy coating mix and stick them into the cake balls.
Step 5: Coat the Pops
This is a fun process. I recommend using two bags of coating so you're able to dip the entire ball and get through about 25 or so of them. You might need to re-heat your candy melts again. If the mixture still seems too thick, you can add a tablespoon or two of shortening or vegetable oil to thin it out. I suggest putting the shortening in before you re-heat the candy melts. Carefully dunk the cake pop into the melted candy. Turn it around until it is completely covered. Then, take the cake pop out and gently turn it over and over until all the excess candy melt has dripped off. You only need a very thin layer of the candy melt.
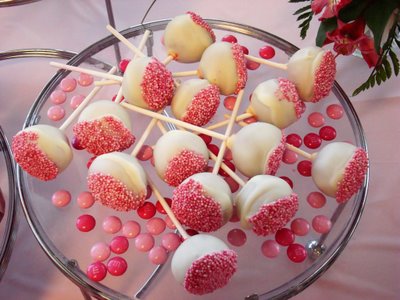
Step 6: Decorate the cake pops.
I normally get another color candy coating and using a decorating tip in a zip lock back and make swirls. This is where you get creative and personalize your own. Below are some examples of how you can get fancy. Enjoy!!!!